Welcome! This guide provides essential information for new Accu-Chek Aviva users, ensuring a confident start with effective blood glucose monitoring.
The Accu-Chek Aviva system empowers individuals to proactively manage their diabetes with reliable results and user-friendly features, as detailed within.
What is the Accu-Chek Aviva?
The Accu-Chek Aviva is a blood glucose monitoring system designed for individuals managing diabetes. It’s a crucial tool for self-monitoring, providing real-time glucose readings to inform treatment decisions. This system, as highlighted in available user guides and manuals, consists of a meter, test strips, and a lancing device for obtaining blood samples.
Developed by Roche, the Aviva meter is known for its accuracy and ease of use. It’s more than just a device; it’s a partner in proactive health management. Manuals emphasize its role in helping users understand how food, exercise, and medication impact their glucose levels. The system aims to simplify the testing process, making it accessible for daily use and empowering individuals to take control of their well-being.
Key Features and Benefits
The Accu-Chek Aviva boasts several key features enhancing user experience and diabetes management. User guides detail its high accuracy, delivering reliable glucose readings for informed decisions. A prominent benefit is its simple operation, making testing straightforward even for beginners. The system’s memory function, as noted in manuals, stores results for tracking trends over time.

Furthermore, the Aviva supports data transfer to computers or smartphones, facilitating detailed analysis and sharing with healthcare professionals. Control solution testing ensures meter and strip functionality. Its compact design promotes portability, and the MyValues feature offers personalized insights. Ultimately, the Accu-Chek Aviva empowers users with the tools needed for effective self-management.
Setting Up Your Accu-Chek Aviva
Initial setup is simple! This section guides you through unboxing, component verification, test strip insertion, and personalizing device settings for optimal use.
Unboxing and Component Check
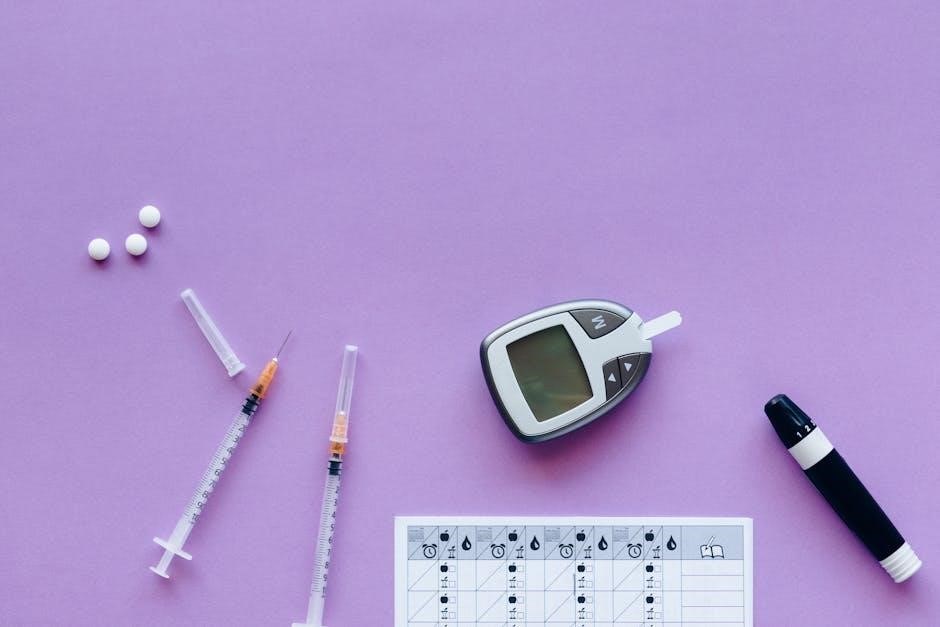
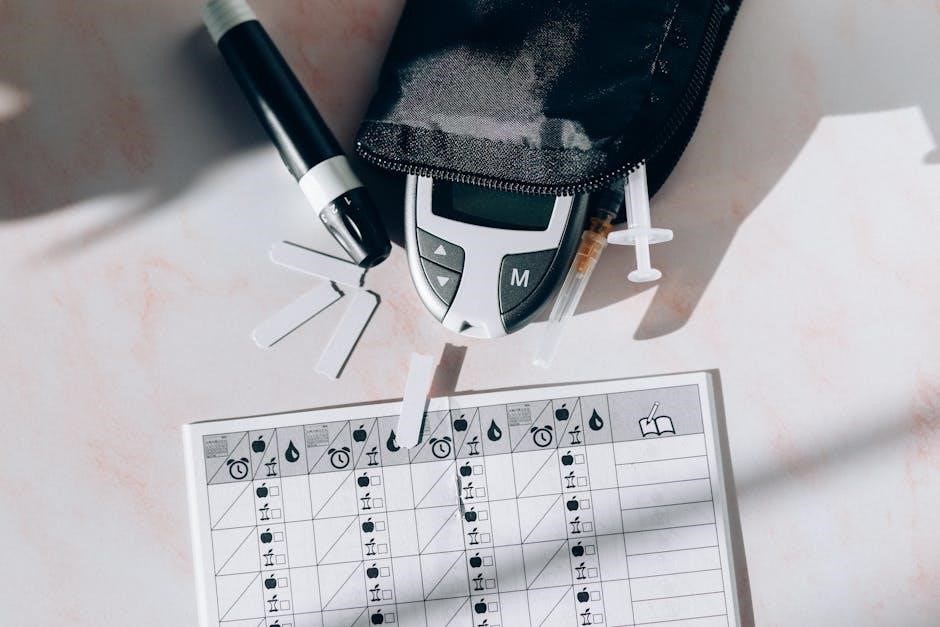
Carefully unpack your Accu-Chek Aviva kit. Ensure all listed components are present before proceeding. You should find the Accu-Chek Aviva meter itself, a lancing device with a lancet drum, a supply of test strips (verify the expiration date!), a control solution, and a user manual – this very guide!
Inspect each item for any signs of damage during shipping. The meter’s screen should be clear, and the lancing device should operate smoothly. Confirm the control solution vial is sealed. If anything is missing or damaged, contact Roche Diabetes Care customer support immediately for assistance. Proper component verification ensures accurate testing from the start, contributing to effective diabetes management.
Inserting the Test Strip
Proper test strip insertion is crucial for accurate readings. Gently remove a test strip from the vial, avoiding touching the test area (the gold-colored contacts). Immediately reseal the vial tightly to maintain strip integrity and prevent moisture damage.
With the meter powered on, insert the test strip into the designated port, ensuring the strip is fully seated. The meter will automatically recognize the strip and display a readiness symbol. Incorrect insertion can lead to error messages or inaccurate results. Always use genuine Accu-Chek Aviva test strips for optimal performance and reliability. Discard any damaged or expired strips.
Device Settings and Customization
Personalize your Accu-Chek Aviva meter for optimal usability. Access the settings menu by navigating through the device’s interface using the control buttons. Here, you can adjust the date and time for accurate record-keeping. Customize your target range settings based on your healthcare provider’s recommendations.
Configure meal markers to associate readings with meals, aiding in post-meal glucose analysis. Adjust display brightness for comfortable viewing; Explore options for unit selection (mg/dL or mmol/L). These customizations enhance the meter’s functionality, tailoring it to your individual needs and preferences for effective diabetes management.
Performing a Blood Glucose Test
Ready to test? Follow these steps for accurate results. Proper technique ensures reliable blood glucose readings, empowering informed diabetes management decisions.
Preparing for the Test
Gather your supplies: Ensure you have your Accu-Chek Aviva meter, a new test strip, a lancing device with a fresh lancet, and alcohol swabs readily available. Wash your hands thoroughly with warm water and soap, then dry them completely – this is crucial for accurate results and preventing infection.
Prepare the lancing device: Insert a new lancet into the lancing device, adjusting the depth setting according to your skin type and preference. A lower setting is suitable for softer skin, while a higher setting may be needed for thicker skin. Ensure the device is cocked and ready for use. Finally, select a testing site, typically on the side of a fingertip, avoiding areas that are calloused or bruised.
Lancing Technique and Blood Sample Collection
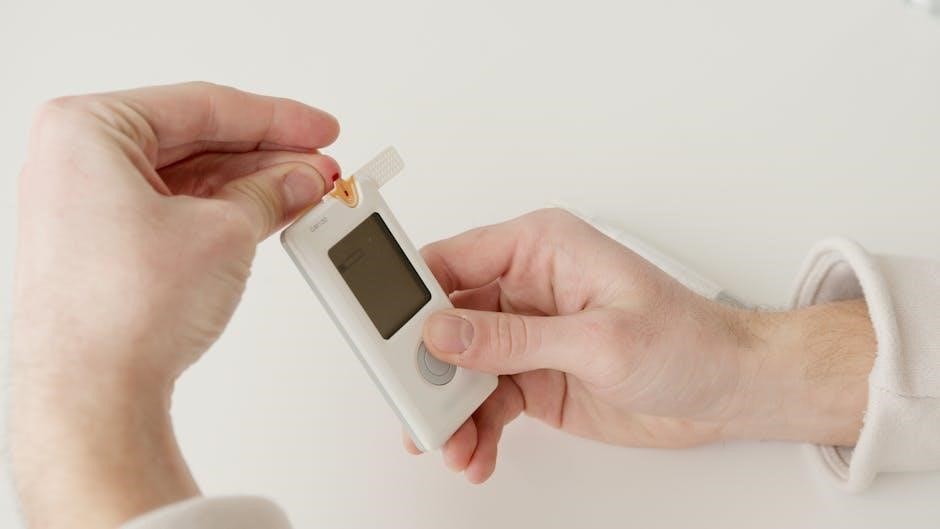
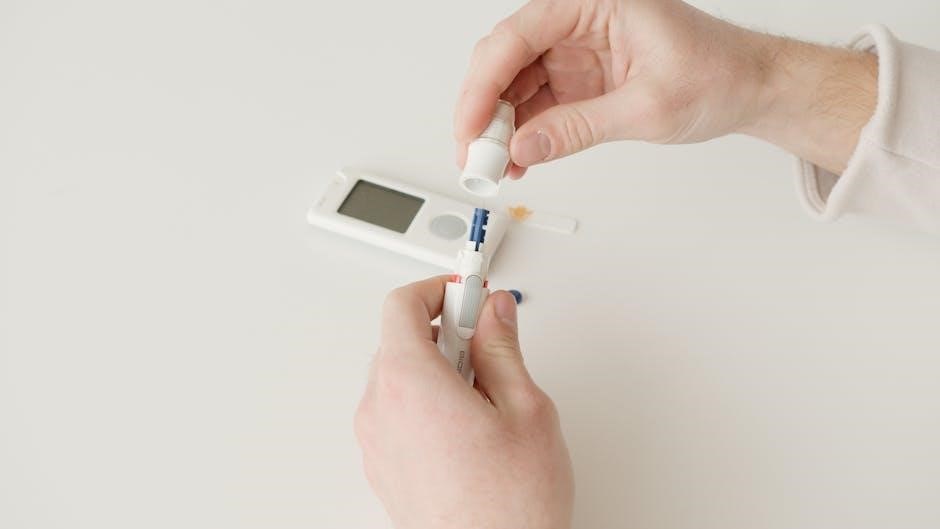
Position the lancing device firmly against the chosen fingertip site. Press the release button to obtain a small blood drop. Avoid squeezing the finger excessively, as this can dilute the sample with tissue fluid and affect accuracy. If the initial puncture doesn’t yield enough blood, gently massage the finger towards the puncture site – avoid repeated, forceful squeezing.
Wipe away the first drop of blood with an alcohol swab, as it may contain tissue fluid. A second, slightly larger drop should form quickly. This drop is ideal for application to the test strip, ensuring a sufficient sample volume for reliable glucose measurement. Remember to avoid touching the test strip with the fingertip.
Applying Blood to the Test Strip
Hold the test strip firmly with the designated contact area facing the blood drop. Gently touch the edge of the blood drop to the front of the test strip; the strip will automatically draw in the required amount of blood via capillary action. Do not smear or wipe the blood onto the strip – allow it to be absorbed naturally.
Ensure sufficient sample volume is applied, as indicated by the meter displaying a readiness signal. Insufficient blood can lead to inaccurate results or error messages. Avoid re-using test strips, and discard used strips safely. Proper application is crucial for reliable glucose readings.

Understanding Your Results
Accurate interpretation of glucose readings is vital for effective diabetes management. This section details how to read, interpret, and track your data.
Reading the Glucose Level
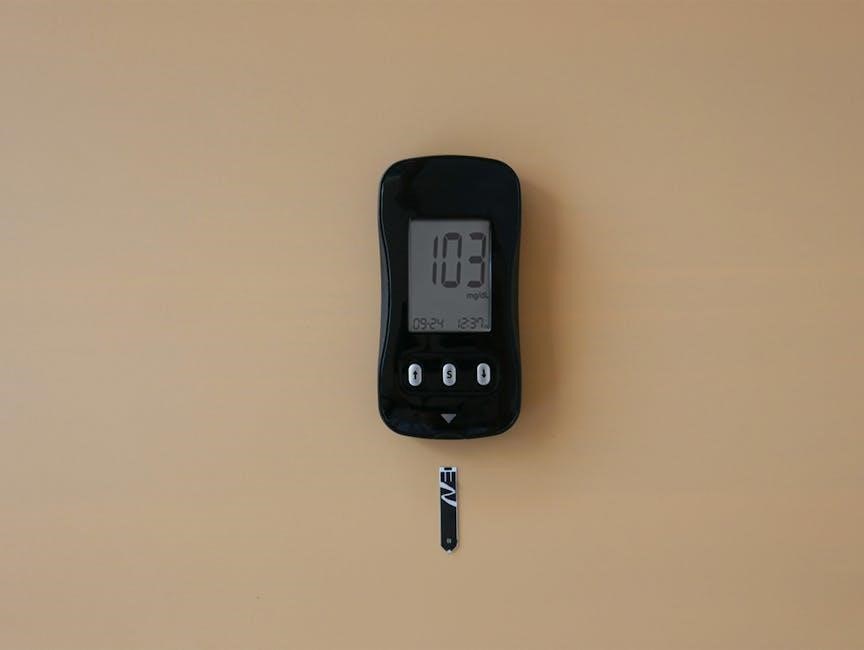
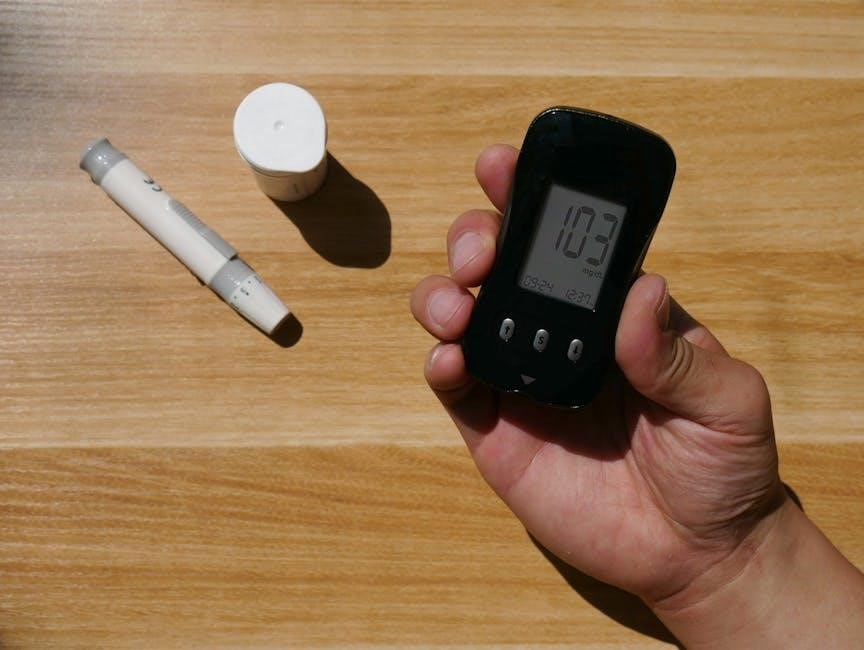
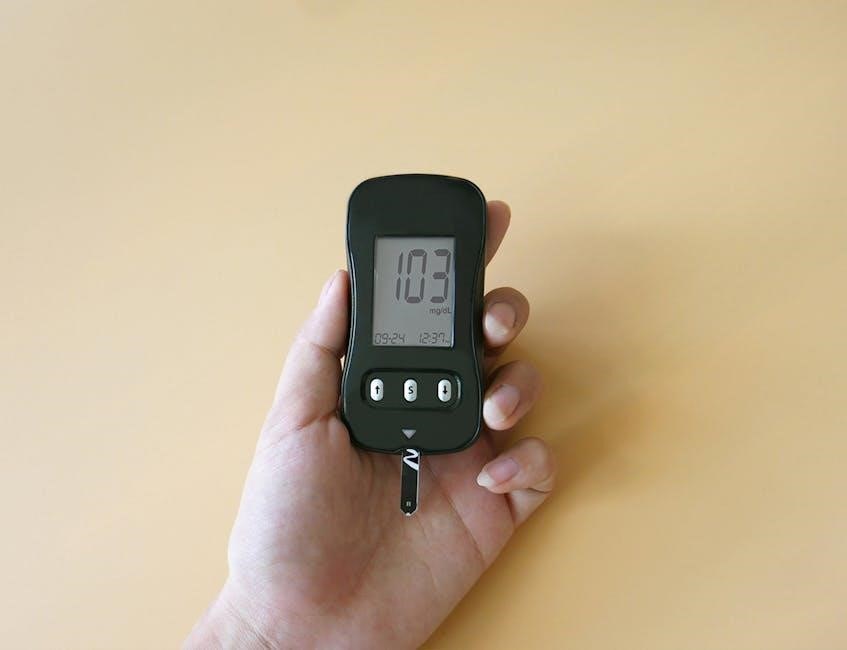
Decoding your results with the Accu-Chek Aviva is straightforward. After applying your blood sample, the meter swiftly displays your blood glucose level in milligrams per deciliter (mg/dL). The large, clear display ensures easy readability, even for those with visual impairments.
Pay close attention to the unit of measurement – confirm it’s set to mg/dL if that’s your preference. The meter also indicates if the reading is before or after a meal, aiding in comprehensive tracking. Remember to note the time of the test alongside the glucose level for a complete record. Consistent monitoring and accurate recording are key to understanding your body’s response to food, exercise, and medication.
Interpreting High and Low Readings
Understanding your glucose levels is crucial for effective diabetes management. Generally, a reading above 200 mg/dL after two hours post-meal indicates hyperglycemia (high blood sugar). Conversely, a reading below 70 mg/dL signifies hypoglycemia (low blood sugar).
These are general guidelines; your target range may vary based on your healthcare provider’s recommendations. High readings may necessitate adjustments to diet, exercise, or medication. Low readings require immediate action – consume fast-acting carbohydrates like glucose tablets or juice. Always consult your doctor to determine the appropriate course of action for consistently high or low readings, ensuring personalized and safe diabetes care.
Memory Function and Data Review
The Accu-Chek Aviva boasts a substantial memory capacity, storing up to 500 test results, providing a comprehensive history of your glucose levels. This allows for effective trend analysis and informed discussions with your healthcare provider.
You can easily review past readings directly on the device, navigating through the data using the control buttons. The meter calculates averages – 7, 14, and 30-day – offering valuable insights into your glucose control. Regularly reviewing this data helps identify patterns, understand the impact of lifestyle factors, and optimize your diabetes management plan for better health outcomes.
Accu-Chek Aviva Advanced Features
Explore beyond basic testing! Discover features like control solution testing, MyValues trend analysis, and seamless data transfer for comprehensive diabetes management.
Control Solution Testing
Ensuring Accuracy: Control solution testing verifies your Accu-Chek Aviva meter and test strips are functioning correctly, providing confidence in your results. This process involves using a known solution – purchased separately – with a specific glucose range.
How to Perform: Apply a drop of control solution to a test strip as if it were a blood sample. The meter will display a result; this must fall within the range printed on the test strip vial.
Interpreting Results: If the result is within range, your system is working accurately. If not, troubleshoot by repeating the test or contacting customer support. Regular control solution testing, especially with new test strip batches, is highly recommended for reliable monitoring.
MyValues Feature and Trend Analysis
Understanding Your Patterns: The Accu-Chek Aviva’s MyValues feature provides personalized insights into your blood glucose trends, going beyond single readings. It calculates averages – 7, 14, and 30 days – helping you identify patterns and understand how diet, exercise, and medication impact your levels.
Trend Arrows: These visual cues indicate the direction your glucose is heading – rising, falling, or remaining stable – offering immediate feedback.
Personalized Insights: By analyzing these trends, you and your healthcare provider can make informed decisions to optimize your diabetes management plan, leading to better control and overall health.
Data Transfer to Computer/Smartphone
Seamless Data Management: The Accu-Chek Aviva allows convenient data transfer to track your glucose readings digitally. Utilizing the Accu-Chek Connect software, you can download readings from your meter to a computer via USB.
Mobile App Connectivity: Alternatively, compatible smartphones can connect wirelessly via Bluetooth, enabling automatic data synchronization with the MyValues app.
Enhanced Analysis & Sharing: This digital data facilitates detailed analysis, report generation, and easy sharing with your healthcare team, fostering collaborative diabetes management and informed decision-making.
Maintenance and Troubleshooting
Keep your Accu-Chek Aviva functioning optimally through regular cleaning, proper storage, and understanding common error solutions for reliable results.
Cleaning and Storage
Maintaining cleanliness is crucial for accurate readings with your Accu-Chek Aviva meter. Regularly wipe the meter’s exterior with a lightly dampened cloth – avoid harsh chemicals or excessive moisture. Never submerge the meter in water.
The lancing device also requires periodic cleaning; follow the manufacturer’s instructions for disinfecting the lancet holder. Proper storage extends the life of your device and test strips. Store the meter in a clean, dry place, away from extreme temperatures and direct sunlight.
Keep test strips in their original vial, tightly closed, and avoid exposure to humidity. Do not store strips in direct sunlight or in a bathroom. Always check the expiration date on both test strips and lancets before use to ensure accuracy and reliability of your blood glucose measurements.
Common Error Messages and Solutions
Encountering error messages? Don’t worry, many are easily resolved. An “E-1” message often indicates an issue with the test strip – ensure proper insertion and check the expiration date. “E-2” typically signals insufficient blood sample; repeat the lancing process, ensuring adequate blood flow.
If you see “E-6”, it suggests a temperature issue; allow the meter and strip to reach room temperature. “E-7” can mean the strip is damaged – use a fresh strip. For persistent errors, try resetting the meter (refer to the full user manual).
If problems continue, contact Roche Diabetes Care customer support for assistance. Always note the specific error code when seeking help, as this aids in faster troubleshooting and resolution of the issue.
Battery Replacement
Low battery? The Accu-Chek Aviva utilizes standard batteries, easily replaceable to maintain uninterrupted monitoring. A low battery icon will appear on the display, signaling the need for replacement. Carefully open the battery compartment, typically located on the back of the device, using a small screwdriver if needed.
Insert new, compatible batteries (usually AAA), ensuring correct polarity as indicated inside the compartment. Close the compartment securely. The meter should power on automatically. Dispose of used batteries responsibly, following local regulations.
Regular battery checks are recommended, especially if the meter is used infrequently. Replacing batteries proactively prevents unexpected interruptions during testing and ensures accurate readings.
Safety Information and Precautions
Important Safety Notes: The Accu-Chek Aviva is for self-monitoring of blood glucose only. Never use it for diagnoses or medical treatment decisions without consulting a healthcare professional. Always wash your hands thoroughly before testing to prevent infection.
Do not share your lancing device or test strips with others. The device is intended for single-person use only. Properly dispose of used lancets in a sharps container, adhering to local regulations. Keep the meter and supplies out of reach of children.
If you experience unusual results or have concerns, contact your doctor immediately. Store the meter and test strips according to the manufacturer’s instructions.